


We need a toolchain and library Dec 2016
Now that the connections and uploading have been dealt with, let’s turn to generating code.
First of all, we need a C/C++ compiler: this one. GCC is now at version 5.0, but 4.8 is also fine (there have been some issues with 4.9 on ARM Cortex, it’s perhaps better to avoid that one…).
You could just go ahead and download from the links mentioned above, but there’s
another way - which might not require a download at all if you’ve already been
working with Arduino or JeeNode boards. Since there are now Ardunio boards with
ARM chips (such as the Due and Zero), that gcc compiler toolchain may already
be on your disk, or very easy to add through the Arduino Board Manager. Here’s
how to check:
- launch the Arduino IDE
- go to
Board: ...=>Board Manager...in theToolsmenu - in the list of packages, there will be two which we can use:
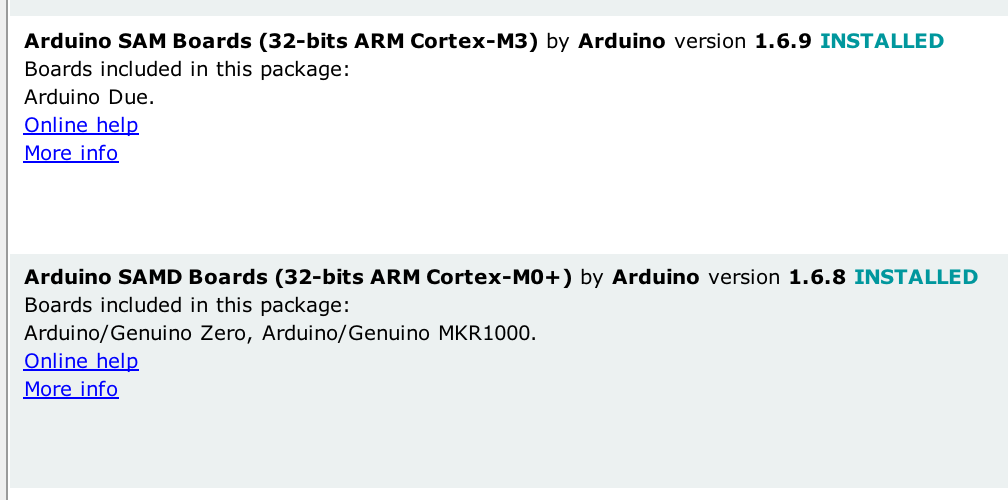
If neither of them is installed, you should install one (either one is ok). This will place the GCC toolchain in an area managed by the Arduino IDE - we just need to figure out where that is.
On MacOS, the GCC toolchain files are installed inside this area:
$HOME/Library/Arduino15/packages/arduino/tools/arm-none-eabi-gcc/On Windows and Linux, the locations will be different. An easy way to find out,
is to look for a file (not directory) called arm-none-eabi-gcc, which is the
name of the GCC compiler itself. On MacOS and Linux, we can use the find
command for this, as follows:
find $HOME -type f -name arm-none-eabi-gccThis should return the path (or maybe more than one) where the file is found.
The proper one is the one inside a .../bin/ directory.
Now that the location of the compiler is known, whether “borrowed” from the Arduino IDE install or by downloading the original ARM Embedded package, we can extend the global search path, by entering this command (adjust as needed, obviously):
PATH=$PATH:/the/location/we/just/found/ending/in/bin/This setting will be lost on logout or reboot. To make it persist, you should
also add this line to your login profile (usually called “~/.profile” or
“~/.bashrc” or “~/.bash_profile”).
To check that everything works, we can launch the compiler and ask it to report its version:
arm-none-eabi-gcc -vHere is the (shortened) output on MacOS using the packages inside Arduino IDE 1.6.13:
Using built-in specs.
COLLECT_GCC=arm-none-eabi-gcc
COLLECT_LTO_WRAPPER=/Users/jcw/Library/Arduino15/packages/arduino/tools/...
Target: arm-none-eabi
Configured with: /Users/build/GCC-4-8-build/gcc-arm-none-eabi-4_8-2014q1-...
Thread model: single
gcc version 4.8.3 20140228 (release) [ARM/embedded-4_8-branch revision ...
We’re good to go. We now have a toolchain to compile and build firmware for ARM µCs!
There is one more important installation step to go through: we need some kind of runtime library, i.e. code which takes care of the initial startup, as well as providing a collection of tested functions to access the hardware peripherals inside the microcontroller. These functions are very vendor-specific, so we need a library which supports the STM32 µCs.
In the Arduino world, you’d use what comes as part of the IDE, with functions
such as pinMode(), digitalRead(), digitalWrite(). In the ARM world, these
could easily be implemented, but the hardware peripherals offer considerably
more sophisticated features, so the libraries tend to be much more elaborate.
One such very capable library is libopencm3. It’s on GitHub, it’s open source (LGPL3), it supports a very wide range of ARM chips by now (not just STM32), it’s well supported, and it’s still actively being extended further. There is a companion repository with example code, and there’s a central website for everything related to libopencm3.
Setting up libopencm3 is quite simple:
download or clone the GitHub repository and put it “somewhere”
chdir to the cloned directory and type “
make” to build the library itselfmake a note where that is and set up an environment variable, as follows:
export OPENCM3_DIR=/path/to/your/libopencm3
again, as with the above PATH setting, it’s best to include this in your profile, so you won’t have to re-enter this on every future login
That’s it, we’re done! It took a bit of preparation, but your computer is now ready to use with the Blue Pill boards and can cross-compile and upload your own code to them. Note that all the steps described in this article only need to be done once. The tedious part is over.